A Sapphire Editor is, essentially, a Global Replace tool. It enables authorized users to search for and select one or more records and:
- Update a value in a field (replacing variations of a value with an approved value, for example).
- Attach the selected record(s) to another record.
- See How to use an Editor to clean up data and process attachments for use cases.
- See Examples of Editors for two configuration examples.
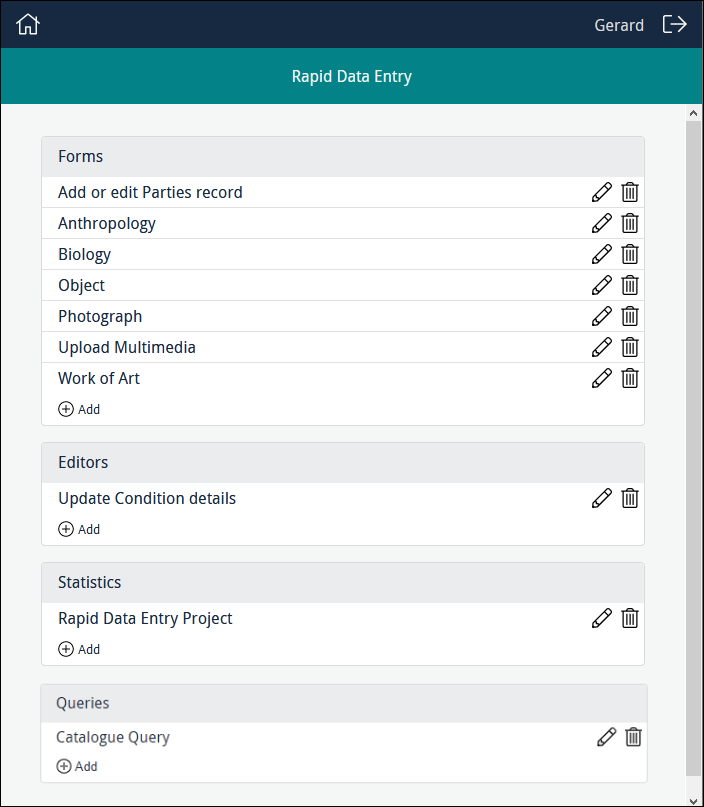
When a Programme Lead accesses a project, any Forms, Editors, Statistics tools and Query pages already created will be listed, along with options to edit, delete and add new instances of them, e.g.:
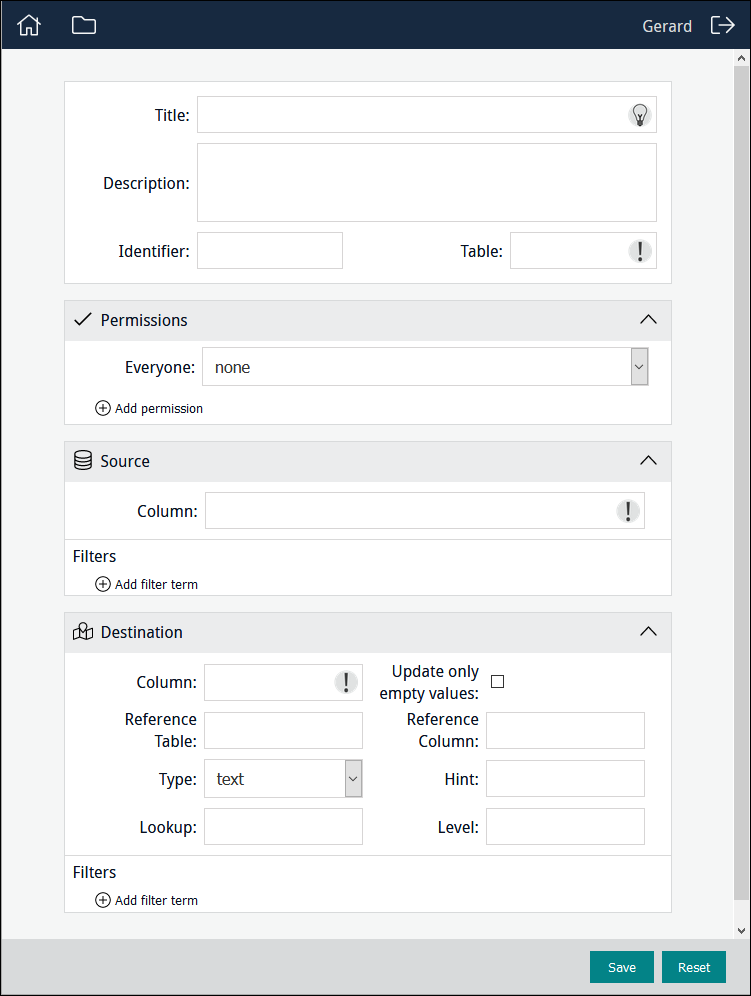
To build a new Form, click  in the Editors section. The Editors creator displays:
Here you configure an Editor, add elements to it, and assign permissions to users (specify who can use this specific Editor; who can modify it).
To edit an existing Editor, click  beside an Editor's title. The Editor will open ready for editing.
|
Title |
A descriptive name for the Editor, which will be listed in the Editors section for authorized users. |
|
A description of the Editor or details about how to use it. When users access the Editor, an Information icon will display alongside the title: Clicking the icon will display a popup with the description. |
|
|
Identifier |
Provide a descriptive identifier for the Editor, or leave blank and an alphanumeric identifier will be assigned automatically. Typically, it is irrelevant whether the identifier is an alphanumeric value provided by the system or a label provided by the Programme Lead as it is only referenced behind the scenes by various components of Sapphire, or used to construct the URL for the Editor. If you want a more human-readable URL, assign an identifier. |
|
Table |
The module that holds the records to be modified. Users will search for records in this module and select one or more records that will be updated by the Editor. |
Three permissions for project elements (Forms, Editors, Statistics, Tasks, Query pages) can be assigned :
|
|
This is the default state for Everyone when a project element is created: the element is not available to users and will not be listed when they log in. |
|
|
When assigned, the project element will be listed when an authorized user logs in. The user can use the project element but not modify it. |
|
|
When assigned, the project element will be listed when an authorized user logs in. The user can use the project element, modify and delete it. When the project element is listed in the Dashboard, the edit |
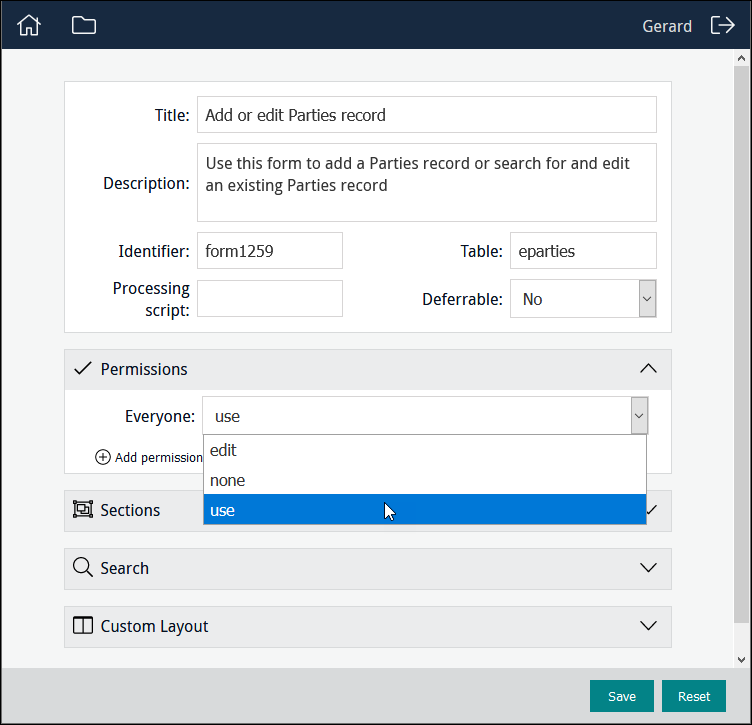
To change access permissions that affect all users of a project element, select the appropriate permission from the Everyone drop list:
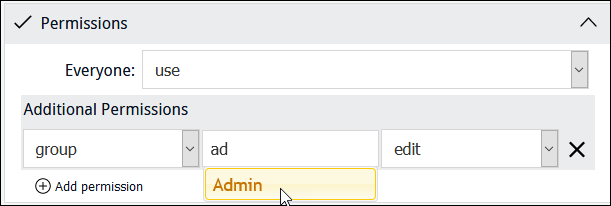
To change access permissions to a project element for a specific user or group:
- Click
 .
.Additional fields display:
- Select user or group from the first drop list.
- Begin keying a user or group name in the second field and select a name from the list of suggestions that will display:
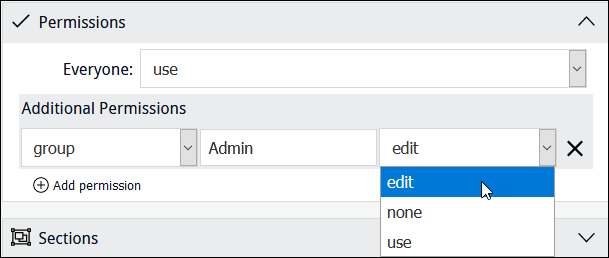
- Select a permission from the Permissions drop-list:
Note: Click  beside an assigned user or group permission to remove it.
Here we specify the field that is searched by users in order to select records to be updated:
|
Column |
The column that users will search in order to select records to be updated. For example, data entry users may have used the Notes field of the Catalogue module to store a range of details about objects, including an object's condition using keywords such as Excellent, Poor, etc. Setting the Source column to NotNotes will allow users to search NotNotes for the keywords and select matching records. |
It is possible to filter values returned from Column.
- Click
 .
. - Specify a Column and Value to filter results displayed in the Source pane of the Editor.
Records displayed in the Source pane of the Editor must meet the criteria specified in Filters.
Here we specify the field that will be updated by the Editor:
|
Column |
The name of the field in Table specified above that will be updated by the Editor. |
|
|
Update only empty values |
This option operates in conjunction with Column. When the checkbox is ticked, the Destination field is not updated by this Editor if the Destination field is already populated. |
|
|
Use when updating attachments |
These two fields auto-complete if Column is an attachment field: |
|
|
Reference Table |
The target |
|
|
Reference Column |
The data that will display in the Target pane of the Editor to assist users to identify and select the correct attachment record. By default, SummaryData is displayed but can be changed here to another field in Reference Table if necessary. It is possible to filter results displayed in the Target pane of the Editor:
|
|
|
Use when replacing / cleaning values in a field |
Type |
Options are:
|
|
Hint |
A hint to users. Text entered here will display in the text box in the Target pane of the Editor. |
|
|
Lookup |
The name of a Lookup List. Values from this list will be listed in the Target pane of the Editor. |
|
|
Level |
If the Lookup List is a multi-level hierarchy, use the Level field to specify which level of the hierarchy to display. |
|
5. Save the Editor.

 icons will display beside its name.